Start Your Engines !

You must have enough available VPCs, Elastic IPs, and NAT Gatewways in the region you are working in to successfully create an EKS Cluster with a managed node group of 2 nodes. You also need to have space for three S3 Buckets. If you run into a problem during the setup, it is usually associated with insufficient resources or permissions in your AWS account. You can resolve resource constraints by requesting a quota increase for your AWS account.
In order to prevent charges to your AWS account, we recommend cleaning up the infrastructure that gets created with the setup utility. If you plan to keep things running so you can examine the workshop a bit more, please remember to do the cleanup when you are done. It is very easy to leave things running in an AWS account, forget about it, and then accrue charges.
Just so you understand ahead of time, you can easily clean up all the resources that get created by the setup utility by using the commands below:
cd /home/ec2-user/environment/modernization_workshop

./teardown_workshop.sh
Let’s do this !
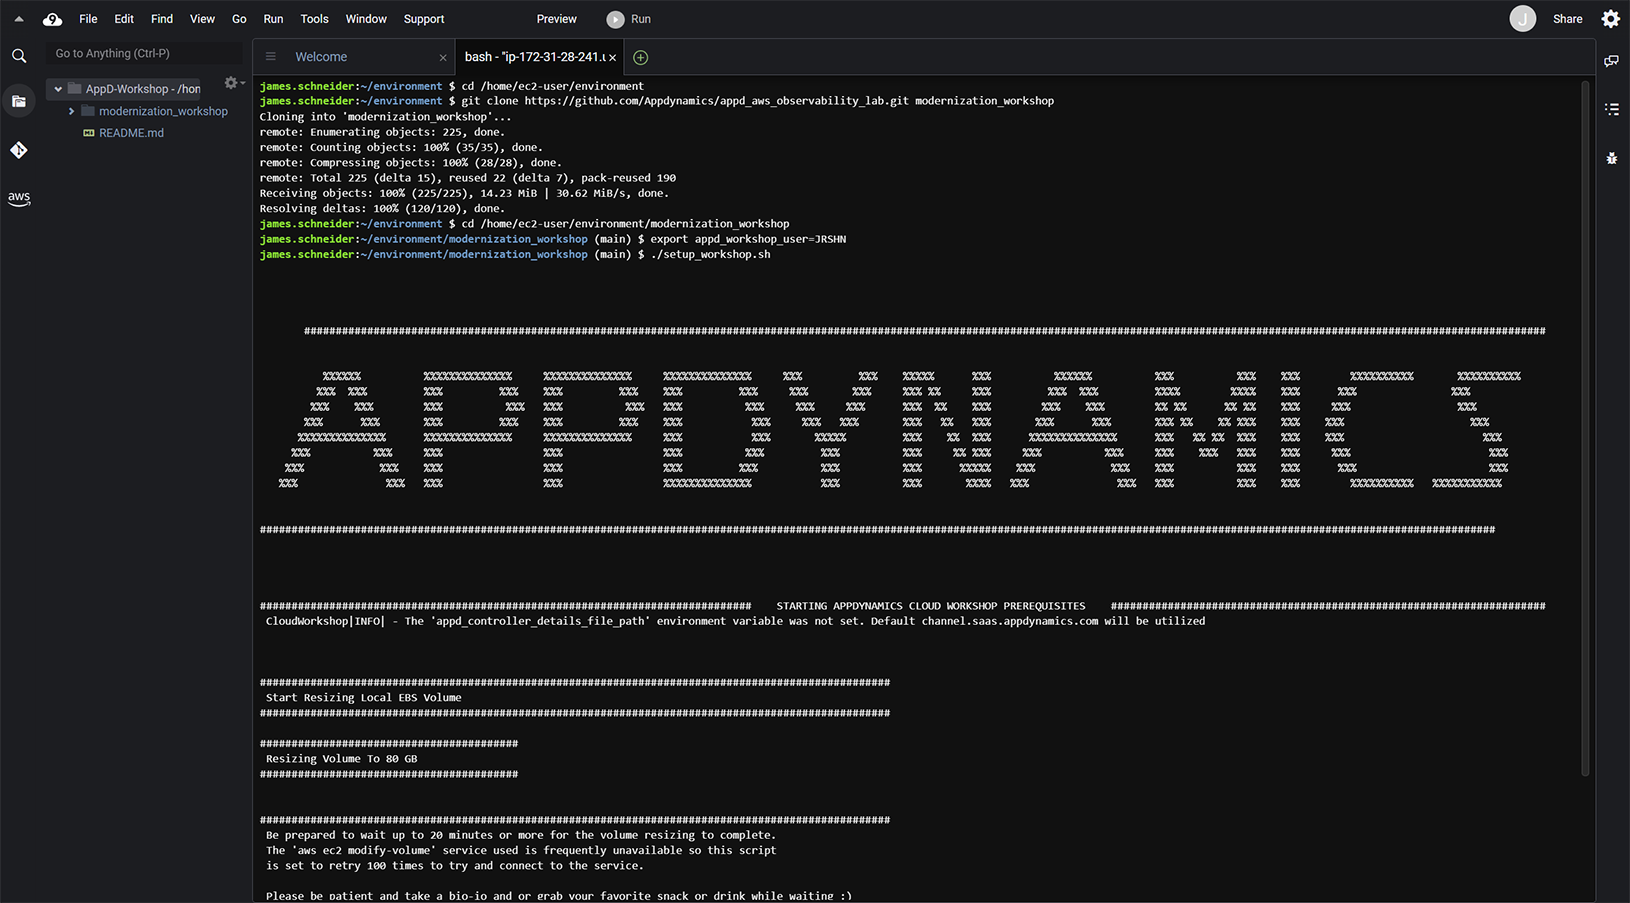
Now that you’ve got all the prerequisites out of the way, you can kick off the initial setup steps and go grab a cup of coffee while the setup utility runs.
Ensure you are in your home directory by executing the command below:
cd /home/ec2-user/environmentClone the GitHub repository for the workshop using the following command:
git clone https://github.com/Appdynamics/appd_aws_observability_lab.git modernization_workshopChange directory to where the repository was cloned using the following command:
cd /home/ec2-user/environment/modernization_workshopUse five (5) letters of your first, and or, your last name to create your unique workshop user name using the command below:
EXAMPLE: export appd_workshop_user=TOMSM
export appd_workshop_user=<YOUR USER NAME>Use the command below to execute the setup script:
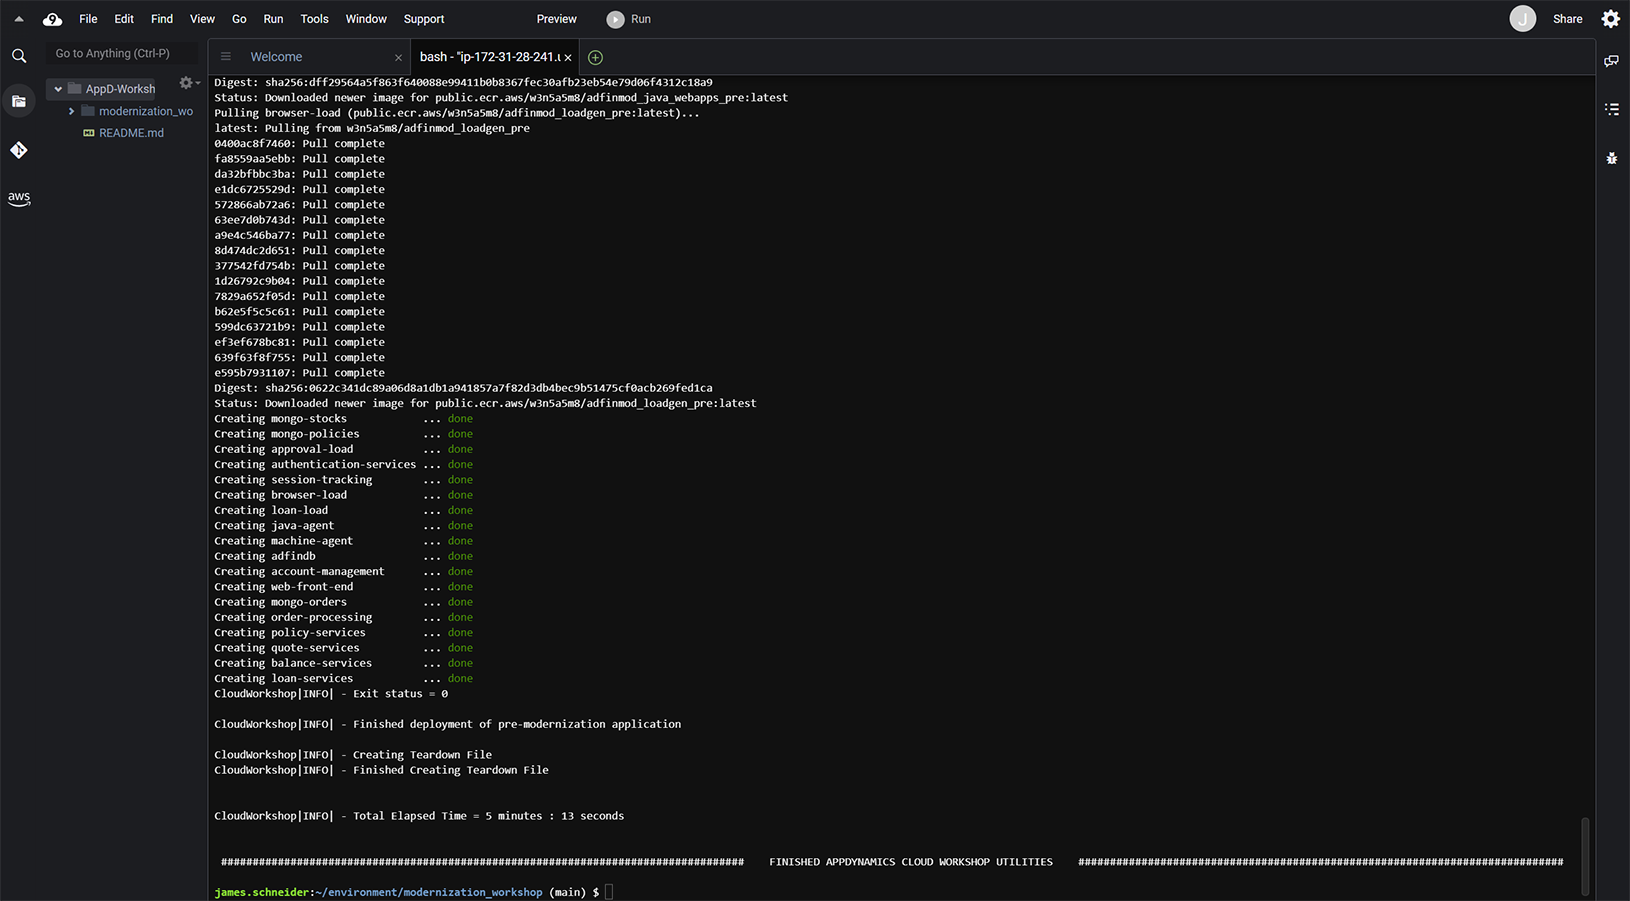
./setup_workshop.shThe setup utility takes approximately 7 minutes to complete. While you’re waiting for the setup to finish you can go to the AppDynamics Advantage section where you can find out why AD Financial selected AppDynamics as their preferred observability solution.
The output from the start of the setup script should look like this:
The output from the setup script when it ends, should look like this:
What the setup utility does
01) Installs Java JDK 1.8
02) Resizes the Disk on your C9 instance
03) Installs kubectl
04) Installs eksctl
05) Installs docker-compose
06) Installs the AppDynamics Database agent
07) Creates an EC2 security group for external access to RDS Databases
08) Creates RDS databases with the security group attached
09) Creates three S3 buckets
10) Creates two Application Performance Monitoring apps in the AppDynamics Controller
11) Creates two Browser Real User Monitoring apps in the AppDynamics Controller
12) Creates two AppDynamics Database collectors in the AppDynamics Controller
13) Creates an RBAC User in the AppDynamics Controller
14) Creates an RBAC Role in the AppDynamics Controller
15) Adds the RBAC User in the AppDynamics Controller to the appropriate RBAC Roles
16) Deploys the Pre-Modernization application to your local C9 instance
17) Creates the teardown file
Using a shell script -
Using the AWS Java SDK -
Using the AppDynamics REST API -
Additional setup in following sections
There will be some additional setup steps in the following sections listed below. There’s no need to do them now. Wait until you’ve reached those sections to perform the steps for each section.
Modernize Section
- Create the EKS Cluster
- Deploy the Application to EKS
- Deploy the AppDynamics Agents to EKS
What the final architecture will look like

Next
While you are waiting for the setup utility to finish, go to the AppDynamics Advantage section where you can find out why AD Financial selected AppDynamics as their preferred observability solution.